Following on from the amazing Desert Dream Shoot we featured last week, super crafty Photographer Meg Ruth also gave us all the details on how you too can create three incredible projects from the shoot.
Fun, colourful and oh-so-easy to recreate these DIY projects are truly inspiring but completely doable. Grab the glue, a needle and thread and lets get started!

Sanded Cube Table Number
The items you need:
- Spray adhesive
- Paper box
- Coloured sand
- Paint and paint brush
- Printed paper with your table number
- Scissors
- Bowls for mixing sand

Prep the sand by mixing different amounts of the colours you want to fade into each other. A lot of yellow with a little orange in the first bowl, an equal amount of both in another bowl, and a lot of orange and a little yellow in the last bowl.
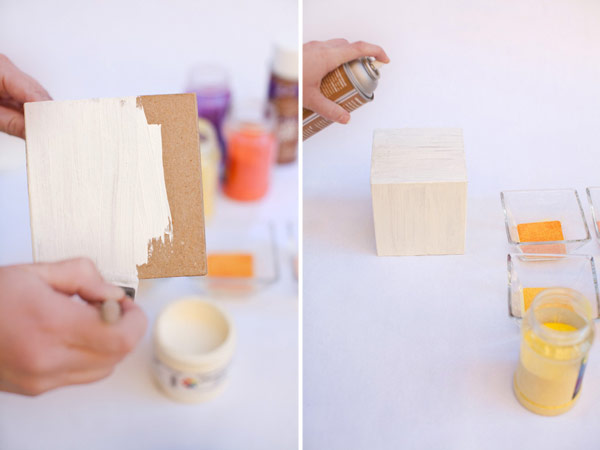
Step 1: Paint box to create a lighter surface so your color stands out more, let dry
Step 2: Spray the glue all over one surface of box. For best results make sure you let the glue fully dry after each step
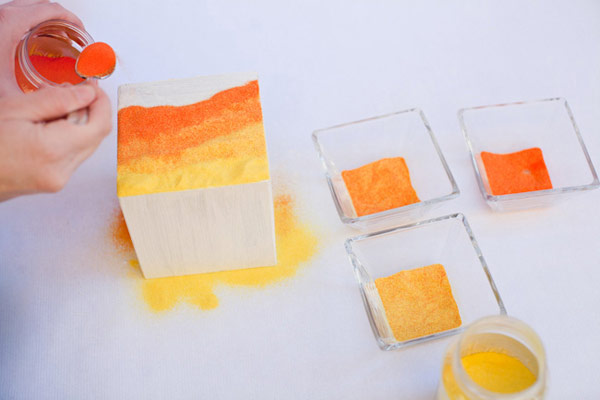
Step 3: Spoon lines of sand across the glued area in a gradient pattern, tip off excess sand, let dry

Step 4: Cut out the number from the paper, place the template over the sanded gradient, spray glue directly over the template

Step 5: Spoon purple sand over the template, remove template and tip off excess sand, let dry

Step 6: Repeat steps 1-3 for better color and sand coverage
Step 7: Repeat on all sides

Dip Dyed Napkins with Embroidered Monogram
The items you need:
- Fabric dye
- 100% cotton napkins
- Bucket or deep container
- Boiling water
- Salt
- Embroidery floss
- Embroidery hoop
- Pencil
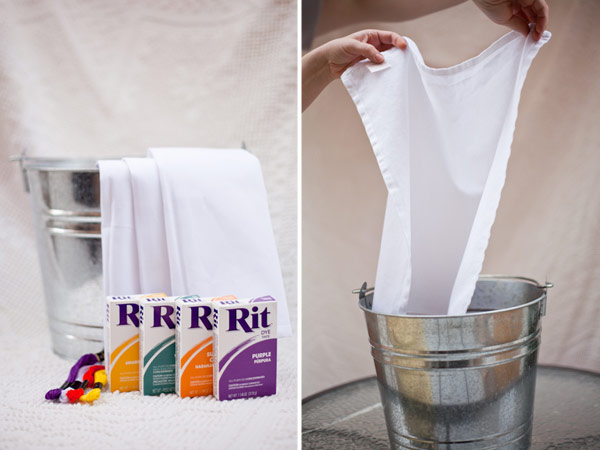
Prep napkins by running them through the wash without softener.
Step 1: Follow directions on dye box for mixing dye, boiling water, and salt. The salt helps hold the dye in the cotton fabric
Step 2: Slowly lower napkin into dye, trying to keep it level with the water to maintain an even line of dye

Step 3: Lower 3/4 into water, hold 10 seconds and lift out 1/4, hold another 60 seconds and lift out another 1/4 (only 1/4 of the napkin should still be in the water), hold for another 60 seconds (or longer) and remove completely from water

Step 4: Carefully place wet napkin on drying rack. As you complete more napkins be sure not to overlap a dyed portion with an un-dyed portion so as not to get drips on the white part of the napkin. Leave to dry completely
Step 5: Sketch out a design for your monogram
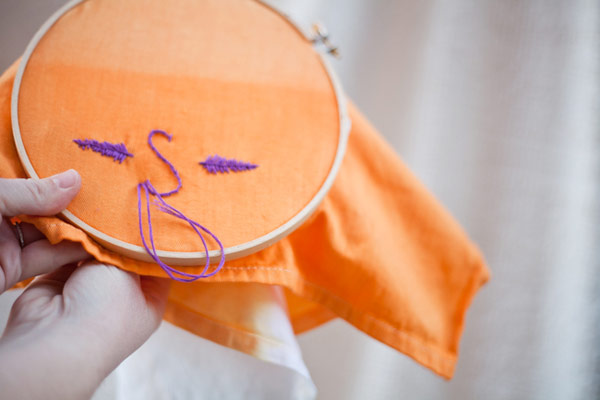
Step 6: Place napkin in embroidery hoop and pull tight
Step 7: Chain stitch your monogram, remove from hoop and iron flat
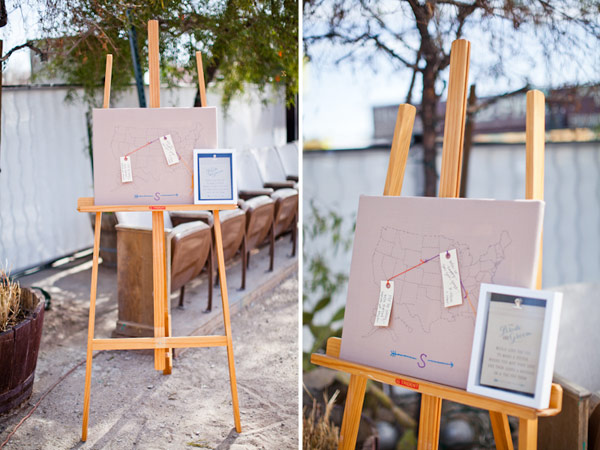
Map Sign-In Canvas
The items you need:
- A canvas the size of your liking (keep in mind tags hanging off map will be large enough for people to write on)
- Embroidery floss
- Needle
- Ultra fine tip Sharpie marker
- Glue gun
- A yard of linen fabric (or faux linen)
- A printed out graphic map of your chosen country enlarged to fill the canvas (Meg used the USA)
- Tags

Prep fabric by cutting it about 3 inches larger on all sides than your canvas (keep this in mind when you buy the fabric).
Cut out the map.

Step 1: Hot glue top centre, then bottom centre, then the centres on of the other sides, then glue around the corners, pulling fabric taught on each side of the canvas.
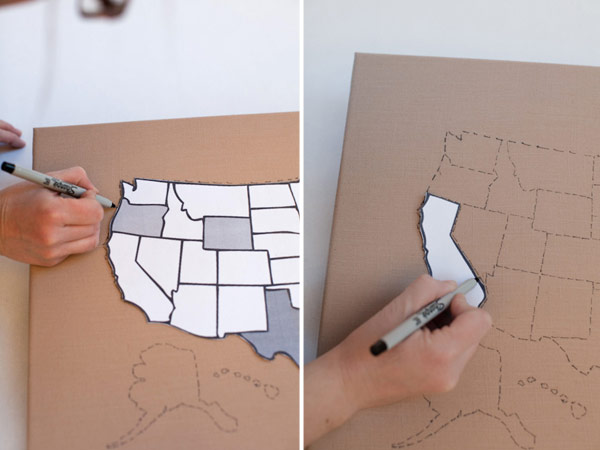
Step 2: Turn the canvas over and place the map in the place you want on the canvas, outline the entire map with the Sharpie with dotted line (cause it's cute!)
Step 3: Begin cutting out a few states/counties at a time and tracing around them with a dotted line on the map. I did this with only a couple at a time to be sure I put them all in the right places.

Step 4: Write on the tag a message to your fiance and make a stitch in the place you met. Then each guest can tie on a stitch and mark where they met with a tagged message to the newly weds!
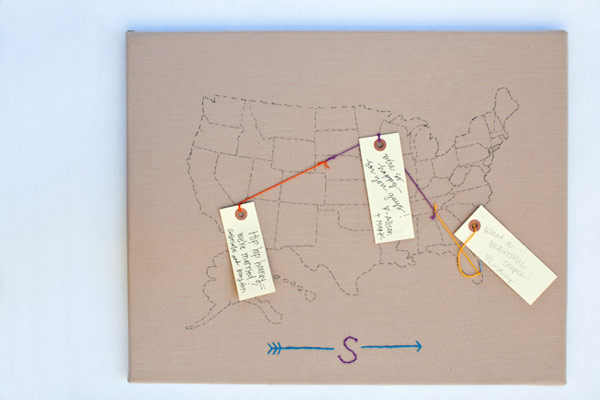
For easiest results use a very graphic map. Also this is a great job to give to junior bridesmaids or friends not in the bridal party, help guests make their stitch in the place they met and tell them out to do it, or even do the stitch for them.
So there you have it ladies and gents, lots of DIY inspiration to get those crafty fingers working! Let us know if you plan on recreating any of these fab projects....


